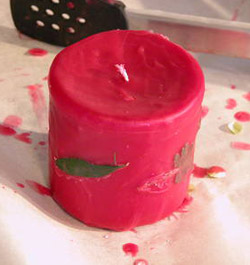
This project involves decorating store bought candles with dried herbs and overlapping with a thin layer of paraffin. Materials:
Pillar candles--3 inches or more in diameter
Spray adhesive or white glue
Dried Herbs or Potpourri mix
Paraffin the 135-145 degree F melting point NOT canning paraffin
Candle scent or essential oils
Small flat brush
Tweezers
Double Boiler (a large pot with a trivet inside it)
Thermometer (0-200 degrees)
Bucket
Pliers
Ice Pick
Directions:
1. Spray the candle with adhesive and attach the leaves and flowers OR brush the leaves and flowers on with white glue and use tweezers to place them on the candle. To attach finely crumbled potpourri, coat the side of the candle with white glue, and roll the candle in the potpourri covering it. DO NOT put plant material on top of the candles as this may catch fire.
2. To set up double boiler--Use a large pot with a trivet inside it, to raise the wax can so that the heated water can flow underneath it. To melt the paraffin, use a container that is taller than the candle. Melt enough wax to submerge the candle. The candle will displace the wax and the container must be deep enough not to overflow when the candle is pushed down into it. A 4 inch pillar candle worked well with a 5 pound coffee can. For anything larger, try a large olive oil can or purchase a wax melting can from a candle supply store. Put the wax into the can and place the can into the pot. Fill the pot with water so that it comes up as high as possible without causing the can of wax to float. Turn on the heat, and wait for the wax to melt and reach a temperature of about 150 degrees.
3. Fill a bucket 3/4 full of cool water and have it near the wax.
4. Grab the wick of the decorated candle with pliers and submerge the candle in the wax. Pull it out slowly, taking particular care to allow the wax to flow slowly over the tip and sides. You don't want large drips. Immediately submerge the candles in the water.
5. Make sure all of the water is off the candle and repeat the waxing process. If you had wax drips from the first coating, you should be able to even them out by pulling out more smoothly the second time. Plunge the candle into the water. This makes it shiny, and cools and hardens it quickly.
6. For a scented candle, place a drop of scented oil into the pool of liquid wax that forms around the lighted wick. Or give a scented candle kit as a gift. With the candle, pack a bottle of scented oil, an ice pick and a decorative card with these directions: Heat the ice pick over a flame and poke five or six holes about 1" deep around the top of the candle. Drop scented oil into the holes and light the candle. For more scent, add a drop of the oil to the pool of wax.
NOTE:
Never leave burning candles unattended. Candles decorated with flammable materials are particularly dangerous.
A 3"-diameter or larger candle is commended for this project because the flame and hot wax rarely reach the outer surface of these large pillars, thus decreasing the chances of the decorations catching fire.
Exercise caution, though. A small draft can push the flame toward one side of the candle.